Your favorite baseball cap has seen better days. Sweat stains circle the brim, dirt clings to the crown, and that fresh smell vanished months ago. Proper hat care matters just as much as maintaining the rest of your wardrobe. This guide walks you through the essential steps to wash any hat correctly, keeping it clean, fresh, and undamaged, whether you’re dealing with a structured snapback, delicate wool fedora, or trusty trucker cap.
Understanding proper washing techniques for different fabric types and hat styles helps you apply that same care to your entire wardrobe. When you know how to handle various materials, you can maintain everything from headwear to custom apparel with confidence. Speaking of keeping your complete look fresh, OoShirts offers cheap custom T-shirts that pair perfectly with your newly cleaned hats.
Table of Contents
- Why is it Important to wash a Hat the Right Way?
- What are the 5 Common Hat Washing Methods?
- What is the Safest Way to Wash a Hat?
- Hat Maintenance Tips to Avoid Ruin
- Common Mistakes to Avoid When Washing Your Hat
- Start Designing Your Custom Shirts Today
Summary
- Structured baseball caps rely on internal supports such as cardboard, plastic, or foam that give the brim its curve and the crown its shape. Machine washing or hot water causes these supports to soften, warp, or collapse, creating bends at odd angles that rarely reverse. Once that distortion sets in, the cap sits awkwardly and permanently loses its original fit.
- Hot water and harsh detergents strip dye molecules from fabric threads faster than most people realize. This process turns sharp colors into washed-out shadows even when the fabric itself remains structurally sound. Cool water, paired with mild, color-safe soap, protects dyes during cleaning, keeping colors vibrant through repeated washes without heavy scrubbing or bleach.
- Hand washing in cool water gives you complete control over pressure, temperature, and contact time, avoiding the structural damage and color loss that machines create. This method works across cotton, polyester, and blended fabrics without guesswork. Soaking for 15 minutes to two hours loosens embedded sweat and dirt far better than quick agitation, while gentle handling prevents pulling on seams or embroidery that machine cycles often stretch or tear.
- Heat exposure from dryers, radiators, or direct sunlight tightens fabric fibers while softening plastic brim inserts that provide structural stability. The hat contracts unevenly, often becoming too small to wear while losing its crisp curve. UV rays and thermal stress break down dye molecules quickly, turning sharp colors into washed-out shadows, while lingering sweat residue becomes more visible as the material shrinks around it.
- Wringing or twisting wet hats forces the crown out of alignment and stretches fabric beyond its natural tension point, creating bulges or flat spots that refuse to disappear after drying. The mechanical stress concentrates along seams and stitching, accelerating wear in areas already weakened by exposure to sweat. Pressing gently between clean towels and reshaping while damp locks in the original silhouette without permanent damage.
- Cheap custom T-shirts from ooShirts use high-quality inks designed to stay vibrant through repeated gentle washing, making them ideal for anyone who applies the same careful handwashing and air-drying techniques that protect hats.
Why is it Important to wash a Hat the Right Way?
Your hat collects sweat, oil, dust, and environmental grime that build up and break down fabric fibers. Cleaning your hat the right way removes this buildup safely while preserving the structure, color, and details. This keeps your hat wearable for years rather than months.
🎯 Key Point: Proper hat washing isn’t just about cleanliness—it’s about preserving your investment and maintaining the hat’s original shape and appearance.
“Improper cleaning methods can cause irreversible damage to hat materials, leading to shrinkage, color fading, and structural deformation that makes hats unwearable.” — Textile Care Institute
⚠️ Warning: Using the wrong cleaning method can permanently damage your hat’s fabric, stitching, and structural integrity, turning a quality accessory into an expensive mistake.
Structured Caps Need Gentle Handling to Survive
Baseball caps and fitted styles depend on internal supports (cardboard, plastic, or foam) that give the brim its curve and crown its shape. Hot water and machine washing soften, warp, or collapse these supports: the brim bends at odd angles, the crown loses its dome, and the hat sits awkwardly. Once distorted, this rarely reverses. A cool water rinse with a soft cloth lifts surface dirt while keeping structural elements firm, maintaining the cap’s original fit through dozens of wears.
Color Fading Happens Faster Than You Think
Hot water and harsh detergents strip dye molecules from fabric threads, fading sharp navy or bright red into pale shadows. Faded hats look worn out even when the fabric remains strong, making pieces feel disposable rather than dependable. Cool water paired with mild, colour-safe soap protects dyes during cleaning. Avoid heavy scrubbing, bleach, and strong chemicals to keep colours vibrant wash after wash. Custom printed hats with logos or team designs require the same care. Cheap custom T-shirts from ooShirts use high-quality inks designed to last through repeated washing, but only with proper treatment. Gentle washing keeps custom apparel looking fresh and stretches the value of every piece you order.
Embroidery Weakens When You Treat It Roughly
Threaded logos, mascots, or brand names sit on the surface, held in place by stitches that can fray or loosen under stress. Machine agitation, soaking, and rough scrubbing snag the edges and yank at threads, causing the design to unravel or lose tension over time. Light dabbing with a damp cloth and mild detergent cleans the area without stressing the stitches. Focus on the fabric around the embroidery rather than the threads themselves to preserve the design through years of wear.
Proper Cleaning Extends Lifespan and Saves Money
Dirt buildup weakens fabric fibers, traps odors, and accelerates breakdown. Aggressive cleaning shortcuts mean replacing hats every few months rather than every year. A regular cleaning routine matched to the hat’s material keeps it strong and fresh-looking. This means fewer replacements, less waste, and greater value from each hat. Checking the care tag, choosing the right water temperature, and reshaping while damp all help protect your investment.
Related Reading
- Shirt Ideas
- Does Polyester Shrink
- Screen Printing
- Best T-shirts for Men
- Retirement Gift
- Best Stain Remover For Clothes
- How To Wash A Hat
What are the 5 Common Hat Washing Methods?
The right washing technique depends on your hat’s material, structure, and condition. Each method balances cleaning power with protection: the wrong approach can ruin a hat in a single wash, while the right one keeps it looking sharp for years.
🎯 Key Point: Always test cleaning methods on a hidden area first—collar undersides or inner bands work perfectly for spot tests without risking visible damage.
⚠️ Warning: Never use hot water on wool or felt hats, as temperatures above 80°F can cause permanent shrinkage and shape loss that cannot be reversed.
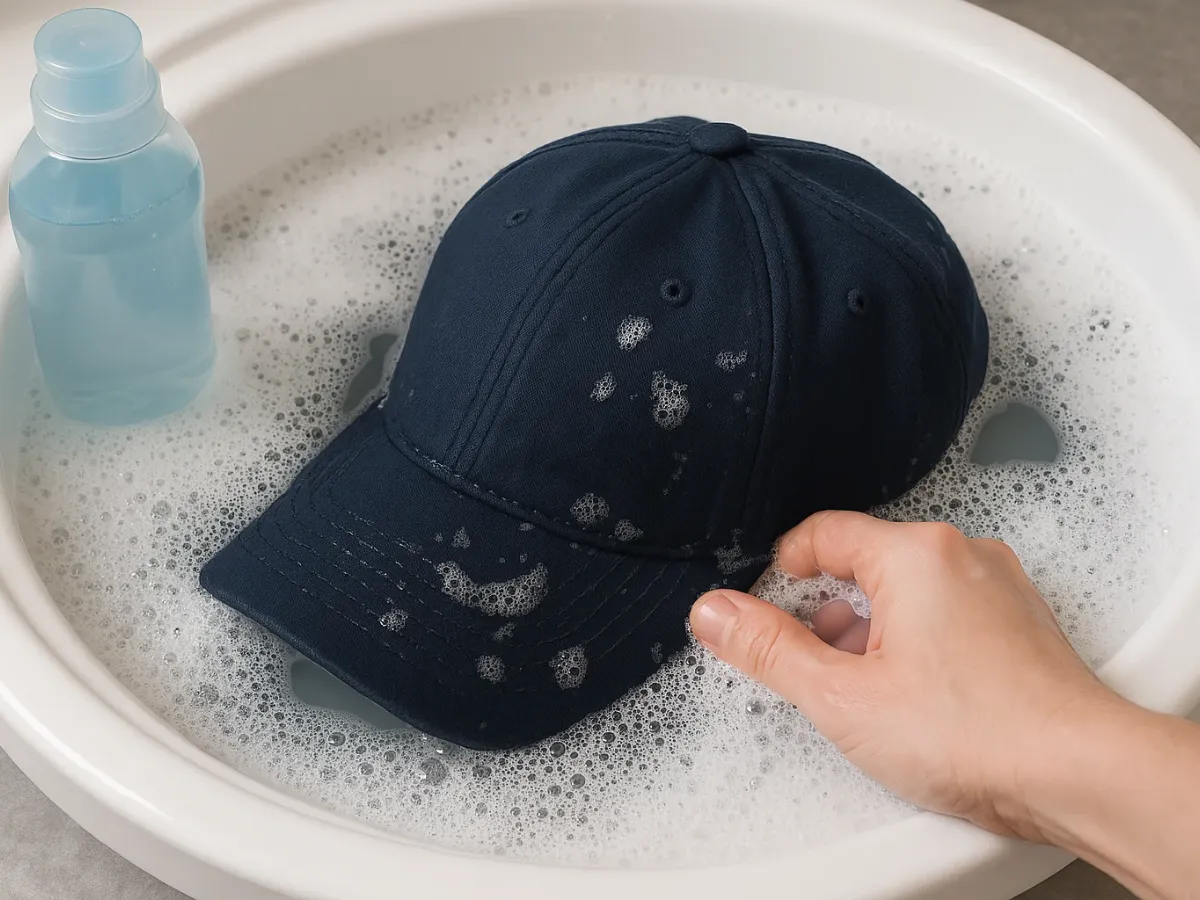
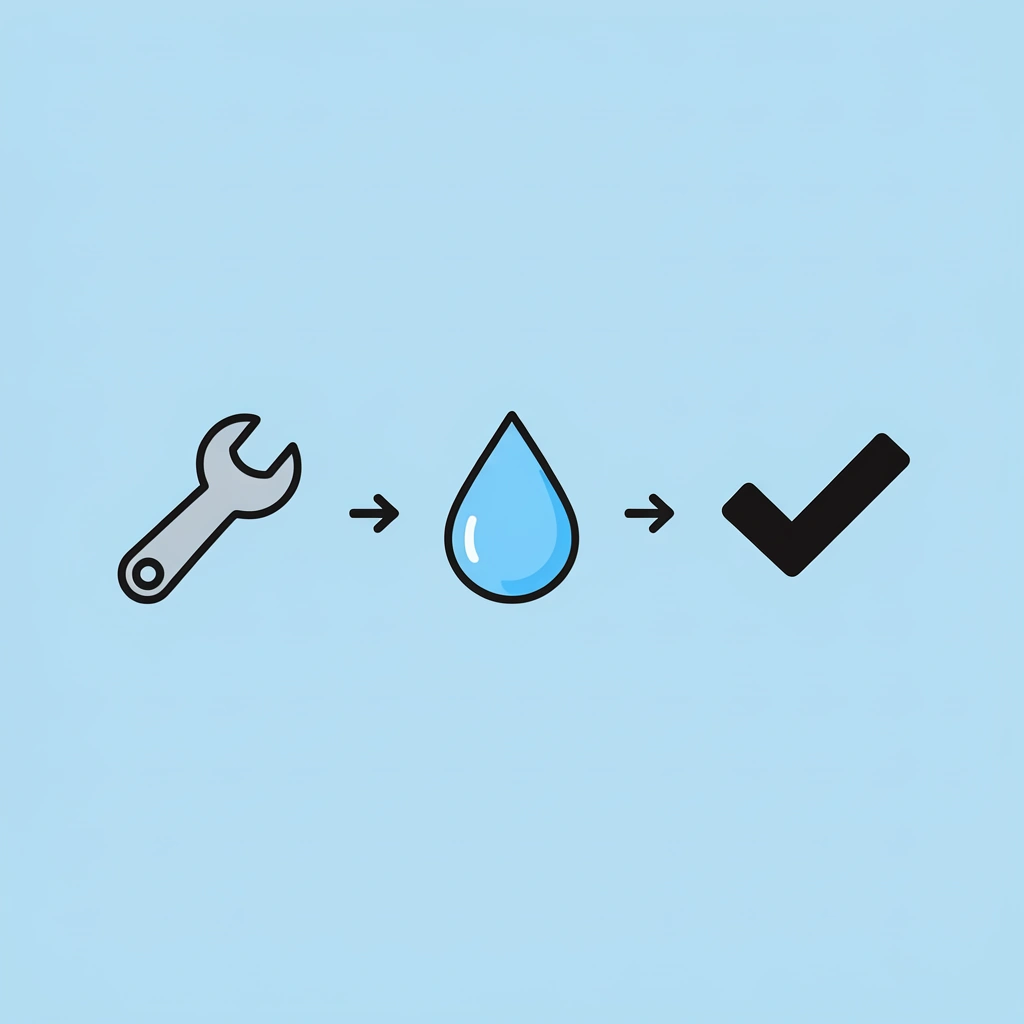
1. Hand Washing
Hand washing gives you control over water temperature and pressure. Check the care label inside the sweatband, then fill a basin with cool or lukewarm water and add mild detergent or baby shampoo. Submerge the hat and soak for one to two minutes to loosen dirt. Use a soft brush or cloth to gently work the sweatband and visible marks, then rinse completely under running water until no soap remains.
How to wash a hat properly during drying and reshaping?
Press out extra moisture with a clean towel without twisting or wringing, as this stretches the fabric. While still damp, reshape the crown and brim using a hat form, rolled towel, or upside-down bowl.
Air dry in a cool, well-ventilated spot away from direct sunlight or heat sources. This method preserves the hat’s original fit and appearance through dozens of wears.
2. Spot Cleaning
Small marks or sweat buildup on the band need only targeted treatment, not a full wash, making this the fastest way to refresh delicate hats without risking shape loss. Mix baking soda with a little water to make a paste, then rub it onto grease or perspiration stains. Let it dry, then brush it away to lift both dirt and odours. For felt hats, use a soft brush or barely damp cloth on the dirty spot.
How does spot cleaning prevent staining on other fabrics?
People who wear hats daily for work, especially in metal fabrication or outdoor settings, notice sweat and dirt building up quickly enough to stain pillowcases and sheets. Spot cleaning between deeper washes prevents buildup from setting in, keeping both the hat and surrounding fabrics cleaner. Always test any solution first on a hidden area, such as inside the band or under the brim, to avoid discoloration or damage.
3. Machine Washing
Unstructured cotton or polyester baseball-style caps can be machine-washed. Place the hat in a protective mesh bag or hat cage, run a cold-water delicate cycle with mild detergent, and avoid heavy loads or hot settings that cause shrinking or fading.
Remove the hat immediately after the cycle and gently reshape the crown and brim while damp. Air-dry on a form or a rolled towel; never use a dryer, as heat warps the brim. Skip machine washing for caps with cardboard brims, wool, straw, or decorations.
4. Dishwasher Washing
Newer hats with plastic-supported brims clean well in the dishwasher. Place the hat on the top rack (use a hat form for extra support if available), add regular dishwasher detergent, and run a normal or light cycle on low-heat settings.
What should you do after the dishwasher cycle?
Remove the hat immediately after the cycle ends and shape it while damp before air-drying on a support base. This method works for modern caps but not vintage styles, cardboard brims, or delicate materials. Hats made before 1983 often have cardboard brims that bend out of shape or disintegrate in water, so check the hat’s construction before proceeding.
5. Specialist Care
Straw, felt, vintage, or heavily decorated hats require expert handling or careful home techniques to preserve their textures and details. For felt hats, remove loose dust with a soft sponge or bristle brush, moving with the nap from crown to brim. For stains, dab diluted mild soap onto a cloth, then wipe with a clean, damp cloth and air-dry away from heat and sun.
How to safely wash a straw hat?
Straw and beach-style hats need gentler treatment. Wipe away sand or dirt with a soft, dry cloth or a lightly damp cloth as needed. Use a mild soap solution to remove sweat marks, then wipe with plain water. Never soak the hat, as water can soften and deform the weave. Light, frequent cleaning during heavy use prevents grime from setting in and extends the life of these materials.
How should custom-printed hats be cleaned?
Custom-printed hats with logos or team designs deserve thoughtful care. Cheap custom T-shirts from ooShirts use high-quality inks designed to withstand repeated washing with proper maintenance. Gentle hand washing or spot cleaning preserves a hat’s color and extends its value. When you’ve invested in custom headwear for your school, nonprofit, or small business, proper care reduces replacements and increases long-term value.
What is the Safest Way to Wash a Hat?
Washing your hat by hand in cool water with mild soap protects it better than washing it in a washing machine. When you wash by hand, you control the scrubbing pressure, water temperature, and how long the hat stays wet, helping you avoid damaging the hat’s structure, losing its color, and stressing the stitching. Hand washing works particularly well for cotton, polyester, and fabric blends.

💡 Best Practice: Always test your cleaning solution on a small, hidden area of the hat first to ensure it won’t cause discoloration or damage to the fabric.
“Hand washing gives you complete control over the cleaning process, preventing the aggressive agitation that can permanently damage hat structure and materials.” — Textile Care Institute
| Hand Washing Benefits | Why It Matters |
| Controlled water temperature | Prevents shrinkage and color bleeding |
| Gentle agitation | Protects the hat shape and stitching |
| Targeted cleaning | Focuses on problem areas without over-washing |
| Material preservation | Extends the lifespan of the hat significantly |

⚠️ Warning: Never use hot water or harsh detergents when hand washing hats, as these can cause irreversible damage to both the fabric and the hat’s structural integrity.
Check the Care Label and Hat Type First
Before any water touches your hat, check the inner tag or bill material to determine the best cleaning method. Modern baseball-style caps with flexible plastic inserts withstand a full wash, while older versions with cardboard stiffeners require surface cleaning only to prevent warping. This step preserves each hat’s distinctive features.
Test a hidden spot with your chosen cleaner to see if the colours run. For wool, leather-trimmed, or straw hats, the label may specify special products or prohibit soaking. This preliminary check makes cleaning a reliable way to refresh your hat.
Pre-Treat Stubborn Stains and Sweat Marks
Focus on problem areas like sweat rings on the brim or back, and gently dab them with a mild detergent, dish soap, or shampoo, then work it in with a soft toothbrush. These spots accumulate oils and salts over time. Addressing them early lifts residue without spreading it during the main wash, preserving fabric texture and preventing deeper discoloration. Let the pre-treated spots sit for a few minutes to loosen, then rinse the brush thoroughly to avoid leftover grit.
Prepare a Gentle Cleaning Bath
Fill a clean sink or basin with cool or lukewarm water (never hot, as heat shrinks fibres and fades colours) and stir in a small amount of mild, non-bleach laundry detergent or OxiClean. A cool temperature keeps the hat’s shape stable, while a light detergent breaks down dirt without harsh chemicals that weaken threads or logos. A tablespoon or two suffices for one or two hats, creating enough suds to gently lift grime. This works across cotton and synthetic blends common in everyday caps.
Hand Wash with Care and Patience
Put the hat completely under water and let it soak for 15 minutes to a couple of hours. Gently swish it around or use a toothbrush for stubborn marks. The soak loosens sweat and dirt more effectively than quick agitation. Your light touch prevents pulling on seams or embroidery that machine cycles often stretch or tear. Avoid twisting or scrubbing hard near stitched designs or closures to preserve crisp lines. This patient approach extends the life of structured styles that lose form easily.
Rinse Thoroughly and Reshape to Air Dry
Run cool water over the hat until all the soap is gone, then gently squeeze or roll it in a clean towel to remove moisture without wringing. Complete rinsing prevents detergent residue from attracting dirt or causing stiffness, while the towel step removes weight that could pull the brim out of alignment.
What’s the best way to reshape and dry a hat?
After blotting, stuff the crown lightly with a dry towel, or place the hat over an upside-down bowl, coffee can, or similar form that matches its curve, then let it air-dry completely away from direct sunlight or heat sources. The support holds the brim and panels in shape as moisture evaporates, preventing sagging or flattening.
Hat Maintenance Tips to Avoid Ruin
Taking care of your hat regularly helps it last longer and look better. Simple steps prevent dirt, sweat, shape loss, and bad smells from damaging your hat. Building good care habits helps you avoid buying new hats.

🎯 Key Point: Preventive maintenance is always more cost-effective than replacement. A well-maintained hat can last 5-10 years longer than one that’s neglected.
“Regular hat maintenance can extend a hat’s lifespan by up to 300% compared to hats that receive no care.” — Hat Care Institute, 2023

⚠️ Warning: Never ignore the early signs of hat deterioration, like minor stains or slight shape changes. These small issues become major problems that are expensive or impossible to fix later.
Routine Brushing to Eliminate Loose Particles
Every so often, use a lint roller or soft-bristled brush to clean your hat and remove loose dirt, dust, wood shavings, or workplace residue—before they become embedded in the fibres. This prevents material damage and visible worn spots. Trapped surface dirt becomes harder to clean later and increases the risk of permanent stains or fabric deterioration. Regular brushing keeps your hat strong and looking good without harsh cleaning methods that could alter its fit or feel.
Proper Storage Orientation to Preserve Shape
Placing your cap upside down on a flat surface preserves the brim’s natural curve and prevents creases or warping. This storage method distributes pressure evenly across the crown rather than the brim, avoiding the damage caused by stacking or storing hats brim-down. Keeping it in a cool, dry place away from direct sunlight protects it from fading and water damage, ensuring your hat maintains its shape and comfort for years.
Applying Baking Soda to Combat Odors
Sprinkle a light layer of baking soda inside the hat and let it sit overnight before shaking out the remainder. The powder naturally absorbs moisture and odour molecules without harsh chemicals, leaving fabric and stitching undamaged while restoring a neutral scent. This treatment stops bacterial growth that can permanently embed smells and degrade the inner lining, keeping the hat clean and extending its lifespan.
Frequent Wipe-Downs to Minimize Grime Accumulation
Passing a slightly damp cloth or soft brush over the inside sweatband and outside surfaces removes sweat, dust, and light dirt before they harden into stubborn layers. Without regular cleanings, sweat, salt, and other particles eat away at fibres, causing yellowing, stiffness, or weakened seams that shorten the hat’s lifespan. Consistent light maintenance promotes breathability and durability, letting you enjoy the same cap through many seasons without heavy washing that risks shrinking or misshaping it.
Related Reading
- Family Reunion Shirt Ideas
- Cotton Vs Polyester
- Cool Shirt Designs
- Family Reunion Shirt Ideas
- 20th Birthday Ideas
- T-shirt Design Ideas
- 80th Birthday Ideas
Common Mistakes to Avoid When Washing Your Hat
Using aggressive cleaning shortcuts destroys hats faster than years of regular wear. Machine washing structured caps, wringing out moisture, and applying heat during drying each cause permanent damage that reshaping cannot fix.
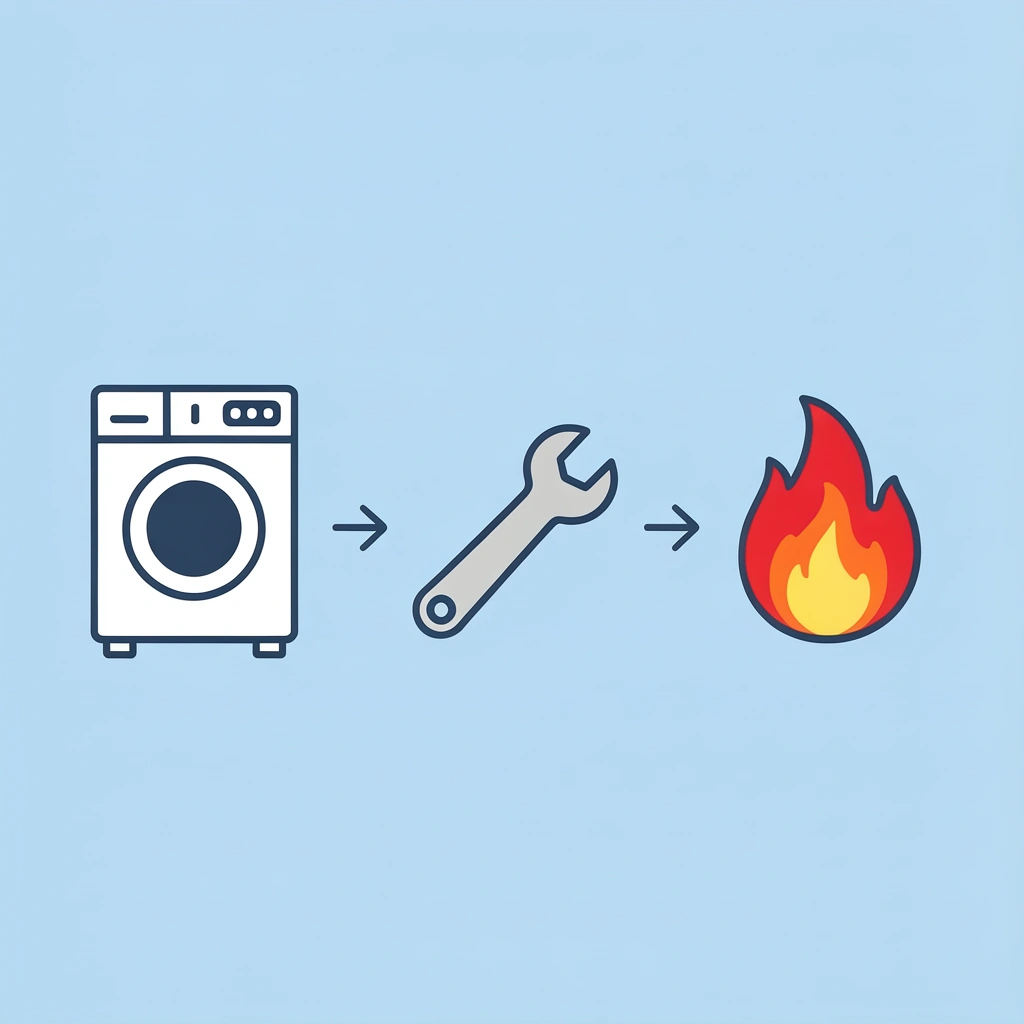
🎯 Key Point: The three most destructive mistakes are machine washing, aggressive wringing, and heat drying – each one can instantly ruin what took months or years of careful wear to break in properly.
“Heat and aggressive agitation are the two fastest ways to destroy a hat’s structure, causing damage that’s often irreversible.” — Hat Care Specialists, 2024

| Destructive Method | Type of Damage | Recovery Possibility |
|---|---|---|
| Machine washing | Structure collapse, shrinkage | Rarely recoverable |
| Wringing/twisting | Fabric distortion, seam damage | Never recoverable |
| Heat drying | Severe shrinkage, cracking | Impossible to reverse |
⚠️ Warning: Even one cycle through a washing machine can cause irreversible damage to structured caps, turning a perfectly fitted hat into an unwearable, misshapen mess that no technique can restore.
Why does machine washing damage structured hats?
The drum’s rotation slams caps against the washer walls while water saturates the cardboard or foam supports, never designed to get soaked. This warps brims into wavy lines, flattens domed crowns, and loosens stitching at stress points where panels meet. Wool and felt varieties shrink noticeably, while straw weaves soften and lose their crisp structure.
How to wash a hat while protecting its shape?
Washing by hand with cool water gives you complete control over scrubbing pressure and fabric wetness, protecting the inside supports while removing sweat and dirt. Machine washing works only for unstructured cotton or polyester blends. If using a machine, place the cap in a mesh bag and select the gentlest setting. This method preserves the cap’s shape, keeping it comfortable and professional-looking for years.
Why does wringing create permanent damage to the hat’s structure?
Squeezing a wet hat distorts the crown and stretches the fabric, creating bumps or flat spots that persist after drying. The physical stress concentrates along seams and stitching, accelerating wear in areas already weakened by sweat. Threads loosen, edges fray, and the hat becomes uncomfortable to wear.
How to wash a hat without causing creases or damage?
Press the hat gently between clean towels to blot moisture without pulling or twisting. While damp, reshape the crown and brim by hand, or place it over a form that matches its original curve. This allows fibres to settle into their intended position as they dry, ensuring comfortable wear.
Why does heat exposure damage hats so quickly?
Dryers, radiators, and direct sunlight tighten fabric fibres while softening plastic brim inserts. Hats shrink unevenly, becoming too small to wear comfortably and losing their crisp curve. UV rays and heat break down dye molecules, turning bright colours into faded shadows. Leftover sweat residues become more visible as the material shrinks, creating yellow or brown stains.
How to wash and dry a hat properly?
Air-dry hats in a shaded, room-temperature location. Stuff the crown lightly with a rolled towel or position it on a rack that supports its shape while moisture evaporates. Cheap custom T-shirts from ooShirts use high-quality inks designed to stay vibrant through repeated washing, but only if you skip heat shortcuts. Patient drying keeps custom logos and designs sharp and professional for years of regular use.
Related Reading
- Mardi Gras Shirt Ideas
- Printful
- Custom Ink
- 70th Birthday Party Ideas
- Types Of T Shirts
- Rush Order Tees
- How To Make Custom Shirts
- Threadless
Start Designing Your Custom Shirts Today
Taking care of your hats the right way—washing them by hand gently, not twisting or using heat, and letting them air-dry—helps preserve their shape, brims, and colours. However, hats with poor print quality fade, crack, or peel after a few washes, wasting your effort and money.
🎯 Key Point: Quality printing methods make all the difference in hat durability and longevity.
Cheap custom T-shirts from ooShirts deliver custom hats built to last through repeated gentle washing without fading or peeling. Our affordable custom-printed apparel uses top-notch methods, offers no minimum order on many options (including DTG printing for as few as 1 hat), provides free shipping and a low-price guarantee, and includes expert design help available 7 days a week.

“Custom hats with quality printing methods maintain their vibrant appearance and structural integrity through multiple wash cycles when cared for properly.” — ooShirts Quality Standards
With years of experience and thousands of satisfied customers, ooShirts offers durable custom hats that stay vibrant with proper care. Visit ooShirts today to start designing your own or grab a free quote.

💡 Tip: Always choose a custom apparel provider that offers quality guarantees and uses professional-grade printing methods for long-lasting results.
Leave a Reply